テスト ケースの設計はさまざまなツールで行うことができ、テスト ケースを自動生成することもできます。テスト ケースを生成するツールを使用している場合、対応するテスト ケースをTestRail 内に自動作成し、テスターがそれを利用して結果をサブミットできるようにするとよいでしょう。
プログラム的にテスト ケースを作成する機能を利用すると、以下のようなケースで使用するツールや統合を作成できます。
-
- 自動化されたテストに基づくテスト ケースの作成
- 組み合わせテスト ケース生成ツール
- その他のモデル ベース テスト ケース生成ツール
| 実際のサンプル | ユース ケース |
|---|---|
| TestRail CLI – JUnit Parser | 自動テストの結果をアップロードしたときにテストを自動的に作成します。 |
| TestRail CLI – OpenAPI Parser | OpenAPI 仕様からテスト ケースを生成します。 |
カスタム フィールドに関する注意点
テスト ケースを拡張するため、TestRail にはテスト ケース フィールドおよびテンプレートをカスタマイズする機能があります。カスタム結果フィールドを設定すると、 custom_automation_status のように、custom_field_name というパターンを使用して値をサブミットできます。
また、以下のいずれかのリクエストを実行すると、すべてのケース フィールドに関する詳細がわかります。
| ケース フィールド | GET index.php?/api/v2/get_case_fields |
| ケース テンプレート | GET index.php?/api/v2/get_templates/{project_id} |
| ケース優先度 | GET index.php?/api/v2/get_priorities |
| ケース タイプ | GET index.php?/api/v2/get_case_types |
| ケース ステータス | GET index.php?/api/v2/get_case_statuses |
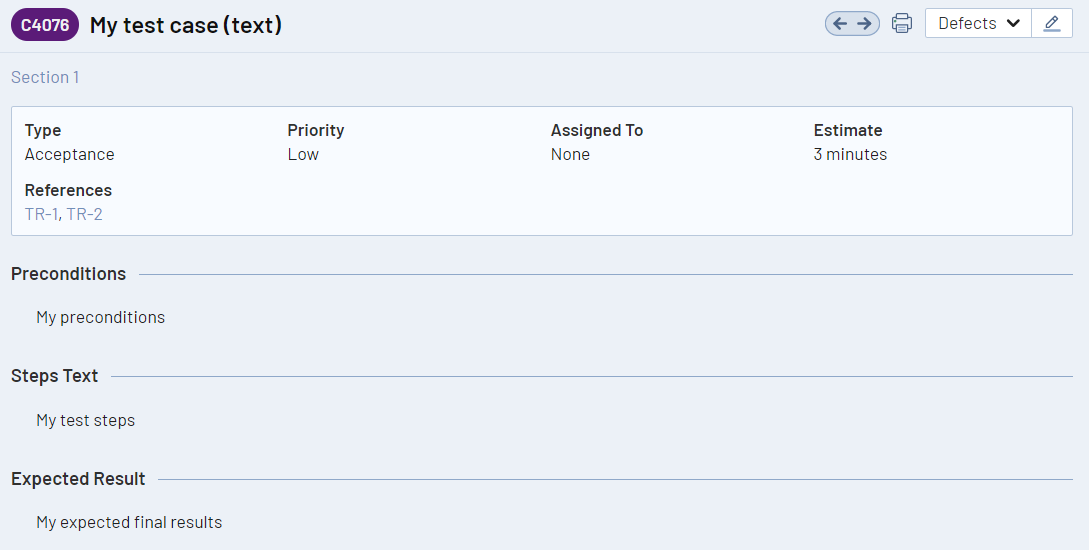
「Test Case (Text)」テンプレートを使用したテスト ケースの作成
テキスト テンプレートは TestRail のデフォルトのテンプレートであり、最も基本的でありながら汎用性があります。テキスト テンプレートには、Preconditions フィールド、Steps フィールド、Expected Result フィールドがあります。以下のサンプルのいずれかのようなコンテンツ ボディでこのフィールドを使用し、テストを作成できます。
リクエスト
POST index.php?/api/v2/add_case/{section_id}
curl -X POST \
  -u "user@example.com:password" \
  -d "@path/to/data.json" \
  "https://example.testrail.io/index.php?/api/v2/add_case/432"
リクエスト ボディのサンプル
{
    "title": "My test case (text)",
    "template_id": 1,
    "type_id": 1,
    "priority_id": 1,
    "estimate": "3m",
    "refs": "TR-1, TR-2",
    "custom_preconds": "My preconditions",
    "custom_steps": "My test steps",
    "custom_expected": "My expected final results"
}
レスポンス ボディのサンプル
{
    "id": 4076,
    "title": "My test case (text)",
    "section_id": 498,
    "template_id": 1,
    "type_id": 1,
    "priority_id": 1,
    "milestone_id": null,
    "refs": "TR-1, TR-2",
    "created_by": 18,
    "created_on": 1684927460,
    "updated_by": 18,
    "updated_on": 1684927460,
    "estimate": "3m",
    "estimate_forecast": null,
    "suite_id": 53,
    "display_order": 1,
    "is_deleted": 0,
    "case_assignedto_id": null,
    "custom_automation_type": null,
    "custom_preconds": "My preconditions",
    "custom_steps": "My test steps",
    "custom_testrail_bdd_scenario": null,
    "custom_expected": "My expected final results",
    "custom_steps_separated": null,
    "custom_mission": null,
    "custom_goals": null,
    "comments": []
}
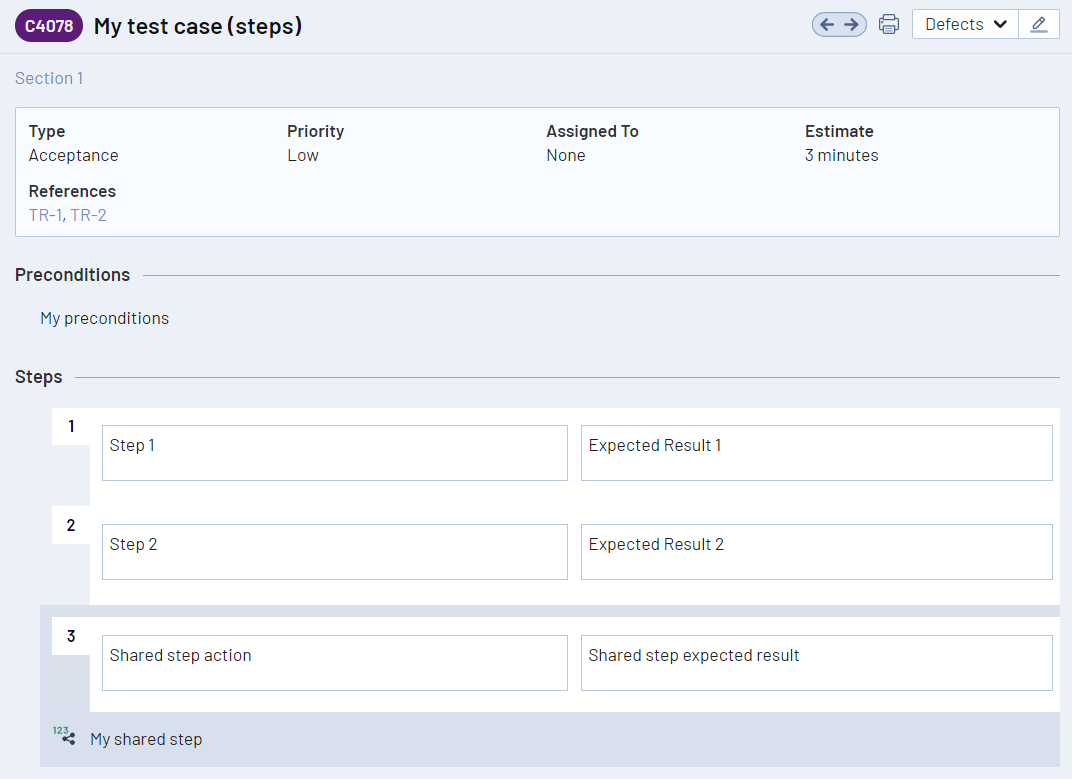
「Test Case (Steps)」テンプレートを使用したテスト ケースの作成
テスト ケースの結果をより細かく管理したい場合、個別のテスト手順を使用してテスト ケースを設計し、実行時にどの手順で失敗したかがわかるようにするとよいでしょう。次のコンテンツ ボディのようなフォーマットを使用すると、個別の手順を持つテスト ケースを作成できます。
リクエスト
POST index.php?/api/v2/add_case/{section_id}
curl -X POST \
  -u "user@example.com:password" \
  -d "@path/to/data.json" \
  "https://example.testrail.io/index.php?/api/v2/add_case/432"
リクエスト ボディのサンプル
{
    "title": "My test case (steps)",
    "template_id": 2,
    "type_id": 1,
    "priority_id": 1,
    "estimate": "3m",
    "refs": "TR-1, TR-2",
    "custom_preconds": "My preconditions",
    "custom_steps_separated": [
        {
            "content": "Step 1",
            "expected": "Expected Result 1"
        },
        {
            "content": "Step 2",
            "expected": "Expected Result 2"
        },
        {
            "shared_step_id": 3
        },
    ]
}
レスポンス ボディのサンプル
{
    "id": 4078,
    "title": "My test case (steps)",
    "section_id": 498,
    "template_id": 2,
    "type_id": 1,
    "priority_id": 1,
    "milestone_id": null,
    "refs": "TR-1, TR-2",
    "created_by": 18,
    "created_on": 1684931159,
    "updated_by": 18,
    "updated_on": 1684931159,
    "estimate": "3m",
    "estimate_forecast": null,
    "suite_id": 53,
    "display_order": 2,
    "is_deleted": 0,
    "case_assignedto_id": null,
    "custom_automation_type": null,
    "custom_preconds": "My preconditions",
    "custom_steps": null,
    "custom_testrail_bdd_scenario": null,
    "custom_expected": null,
    "custom_steps_separated": [
        {
            "content": "Step 1",
            "expected": "Expected Result 1",
            "additional_info": "",
            "refs": ""
        },
        {
            "content": "Step 2",
            "expected": "Expected Result 2",
            "additional_info": "",
            "refs": ""
        },
        {
            "shared_step_id": 3,
            "content": "Shared step action",
            "expected": "Shared step expected result"
        }
    ],
    "custom_mission": null,
    "custom_goals": null,
    "comments": []
}
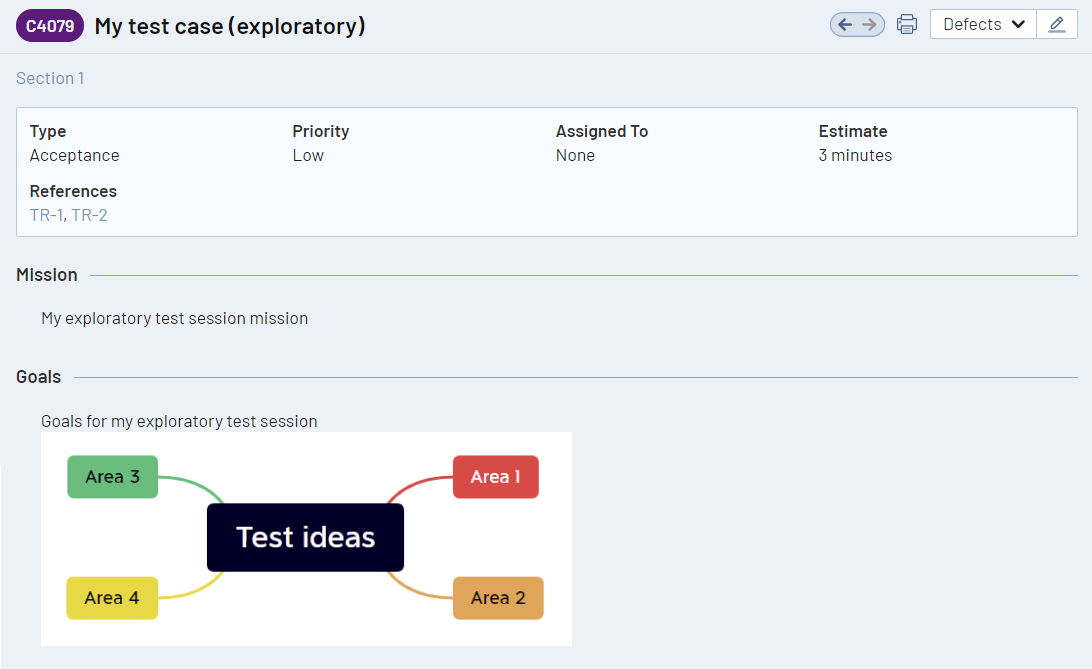
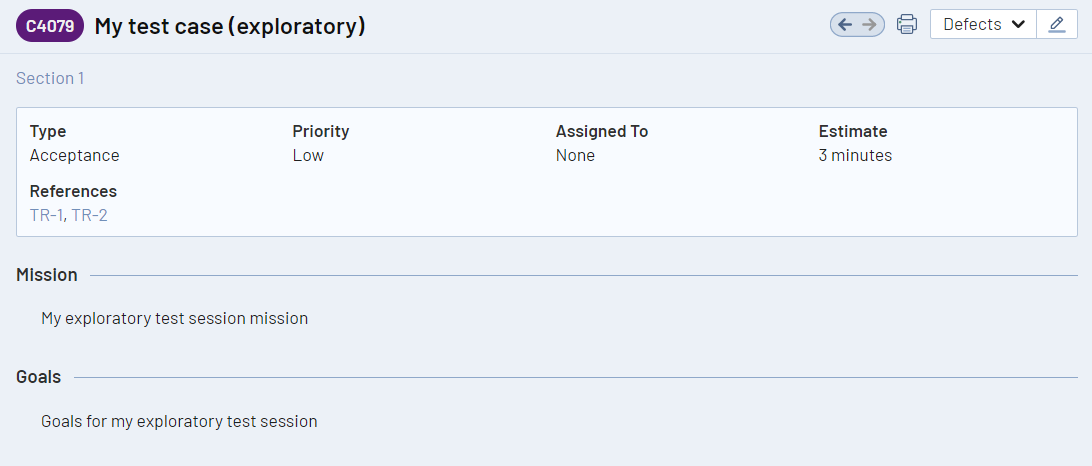
「Exploratory Session」テンプレートを使用したテスト ケースの作成
探索的テストは、比較的制約の少ないやり方でシステムを動かし、システムが申し分のない状態であることを確認するのに非常に適したテスト技術であり、システムを理解するのにも役立ちます。探索的テストを実施しており、後で参照するために探索的テストのチャーターを TestRail に保存したい場合、次のようなコンテンツ ボディを使用できます。
リクエスト
curl -X POST \
  -u "user@example.com:password" \
  -d "@path/to/data.json" \
  "https://example.testrail.io/index.php?/api/v2/add_case/432"
リクエスト ボディのサンプル
{
    "title": "My test case (exploratory)",
    "template_id": 3,
    "type_id": 1,
    "priority_id": 1,
    "estimate": "3m",
    "refs": "TR-1, TR-2",
    "custom_preconds": "My preconditions",
    "custom_mission": "My exploratory test session mission",
    "custom_goals": "Goals for my exploratory test session"
}
レスポンス ボディのサンプル
{
    "id": 4079,
    "title": "My test case (exploratory)",
    "section_id": 498,
    "template_id": 3,
    "type_id": 1,
    "priority_id": 1,
    "milestone_id": null,
    "refs": "TR-1, TR-2",
    "created_by": 18,
    "created_on": 1684931263,
    "updated_by": 18,
    "updated_on": 1684931263,
    "estimate": "3m",
    "estimate_forecast": null,
    "suite_id": 53,
    "display_order": 3,
    "is_deleted": 0,
    "case_assignedto_id": null,
    "custom_automation_type": null,
    "custom_preconds": null,
    "custom_steps": null,
    "custom_testrail_bdd_scenario": null,
    "custom_expected": null,
    "custom_steps_separated": null,
    "custom_mission": "My exploratory test session mission",
    "custom_goals": "Goals for my exploratory test session",
    "comments": []
}
添付ファイルのインポート
添付ファイルは、アプリケーション領域の画面ショットを使用して手順をより視覚的にしたり、テスト実行時に漏れがないよう、テスト図やマインドマップをアップロードしたりしてテスト ケース設計を補強することを可能にします。次のように、リクエストを使用してテスト ケースにファイルを添付できます。
最大許容アップロード サイズは 256MB に設定されていることに注意してください。
リクエスト
Content-Type: multipart/form-data
curl -X POST \
  -u "user@example.com:password" \
  -H "Content-Type: multipart/form-data" \
  -F "attachment=@path/to/image.jpg" \
  "https://example.testrail.io/index.php?/api/v2/add_attachment_to_case/42"
リクエスト ボディのサンプル
レスポンス ボディのサンプル
{ "attachment_id": "758c9b26-6038-4147-9a4d-74cd7af1499a" }
テスト ケースのテキスト フィールドに添付ファイルを追加する場合、次のサンプルのように、テキストを更新してリンクを追加する必要があります。
リクエスト
curl -X POST \
  -u "user@example.com:password" \
  -d "@path/to/data.json" \
  "https://example.testrail.io/index.php?/api/v2/update_case/4079"
リクエスト ボディのサンプル
{
"custom_goals": "Goals for my exploratory test session\r\n "
}
レスポンス ボディのサンプル
{
"id": 4079,
"title": "My test case (exploratory)",
"section_id": 498,
"template_id": 3,
"type_id": 1,
"priority_id": 1,
"milestone_id": null,
"refs": "TR-1, TR-2",
"created_by": 18,
"created_on": 1684931263,
"updated_by": 18,
"updated_on": 1684931263,
"estimate": "3m",
"estimate_forecast": null,
"suite_id": 53,
"display_order": 3,
"is_deleted": 0,
"case_assignedto_id": null,
"custom_automation_type": null,
"custom_preconds": null,
"custom_steps": null,
"custom_testrail_bdd_scenario": null,
"custom_expected": null,
"custom_steps_separated": null,
"custom_mission": "My exploratory test session mission",
"custom_goals": "Goals for my exploratory test session \r\n ",
"comments": []
}