With Bitbucket Pipelines, you can automate all the steps required to build, test and deploy your code. Typically teams use Bitbucket to store their source code. With the CI/CD capabilities, they can also build and test their code inside Bitbucket by creating pipelines to streamline building and testing the code before being deployed.
An everyday use case for Bitbucket Pipelines is building and testing your application whenever code changes are submitted. To take full advantage of TestRail and manage all your test cases and test results, both manual and automated, you can send your automated test results directly from Bitbucket to TestRail. This article will explore how to efficiently use Bitbucket Pipelines and the TestRail CLI to accomplish this task.
Please note that the TestRail CLI requires your test automation framework to generate a compatible JUnit XML report.
Using the TestRail CLI in Bitbucket Pipelines
Automated processes can be configured in Bitbucket using a bitbucket-pipelines.yml file. These YAML files allow you to specify your build process in a structured manner. Under bitbucket-pipelines.yml, you can define a default build environment and the steps to execute when a pipeline is triggered.
The easiest way to integrate TestRail with Bitbucket is by configuring your bitbucket-pipelines.yml to use the TestRail CLI to send automated test results to TestRail. Below is a sample of how a workflow file using the TestRail CLI to send test results to TestRail would look like.
image: python:3.9
pipelines:
  default:
    - step:
        name: Build and run the tests
        caches:
          - pip
        script:
          - apt-get update && apt install -y curl
          - curl -fsSL https://deb.nodesource.com/setup_20.x | bash - && apt-get install -y nodejs
          - pip install robotframework-browser
          - rfbrowser init
          - npx playwright install-deps
          - robot -d reports -x junit-report.xml "./tests" || true
        artifacts:
          - reports/junit-report.xml
    - step:
        name: Install TR CLI and upload the test results to TestRail
        script:
          - pip install trcli
          - trcli -y
            -h https://INSTANCE.testrail.io/
            --project "PROJECT NAME"
            -u USER_EMAIL
            -p PASSWORD
            parse_junit
            --title "Automated Tests from Bitbucket Pipelines"
            --run-description $BITBUCKET_GIT_HTTP_ORIGIN/pipelines/results/$BITBUCKET_BUILD_NUMBER
            -f "reports/junit-report.xml"
Breaking down the bitbucket-pipelines.yml, we notice some interesting facts.
-
- We have chosen the Python image for running this build
- We have two steps within the job
- The first step is to install the Robot Framework Browser Library and run the tests
- The second step is to install TestRail CLI and upload test results to TestRail
The script in both steps defines the commands to execute on the Python image. As a whole, these scripts perform the following functions:
-
- Set up the environment
- Install Robot Framework Browser Library
- Run the tests
- Save the artifacts
- Upload the results to TestRail
Set up the environment
To run the tests with the Robot Framework Browser Library, we need to install Node.js. Below scripts are used to install the Node.js on the Python image.
script:
  - apt-get update && apt install -y curl
  - curl -fsSL https://deb.nodesource.com/setup_20.x | bash - && apt-get install -y nodej
Install Robot Framework Browser Library
Below scripts are used to install the Robot Framework Browser Library from PyPi with pip, to Initialize the Browser library, and to install the system dependencies automatically. Here it’s worth noting that the Robot Framework Browser Library is powered by Playwright.
- pip install robotframework-browser
- rfbrowser init
- npx playwright install-deps
Running the tests
Below script is used to run the tests.
- pip install robotframework-browser
Saving the artifacts
After running the tests, the below script is used to save junit-report.xml as an artifact so that this XML file can be used in the next step to upload the test results to TestRail.
artifacts:
  - reports/junit-report.xml
Upload the results to TestRail
This step will do two different actions
-
- Install the TestRail CLI
- Call the TestRail CLI to upload the JUnit report generated by your test automation framework and send the results to TestRail
The TestRail CLI is a Python package hosted on the Python Package Index (PyPI). To install it, we execute the command pip install trcli.
After the TestRail CLI is installed, there are a few mandatory arguments that we need to pass along with trcli -ycommand, such as your TestRail instance address and credentials, the project you want to report to, the title for your test run, and the path to the JUnit report.
For more information about arguments, please check the TestRail CLI documentation.
- step:
    name: Install TR CLI and upload the test results to TestRail
    script:
    - pip install trcli
      - trcli -y
          -h https://INSTANCE.testrail.io/
          --project "PROJECT NAME"
          -u USER_EMAIL
          -p PASSWORD
          parse_junit
          --title "Automated Tests from Bitbucket workflow"
          --run-description $BITBUCKET_GIT_HTTP_ORIGIN/pipelines/results/$BITBUCKET_BUILD_NUMBER
          -f "reports/junit-report.xml"
Working example using Robot Framework Browser Library
Below is an example that illustrates how to run the Bitbucket pipeline with Robot Framework tests and then report the results to TestRail.
-
- Create a new repository on Bitbucket
- Download the files from the Robot Framework – Browser Library repository
- Replace TESTRAIL_INSTANCE, PROJECT NAME, USER_EMAIL, and PASSWORD in the bitbucket-pipelines.yml file using your details (we recommend not replacing the password directly and using the Bitbucket environment variables instead)
- Upload the project to your Bitbucket repository
Executing the workflow
- Navigate to the Bitbucket website and log in with valid credentials
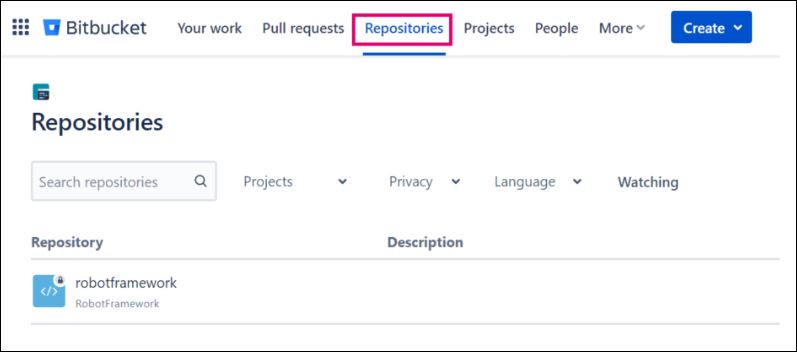
- Click on the Repositories link on the Bitbucket dashboard, and here you will find all of your repositories
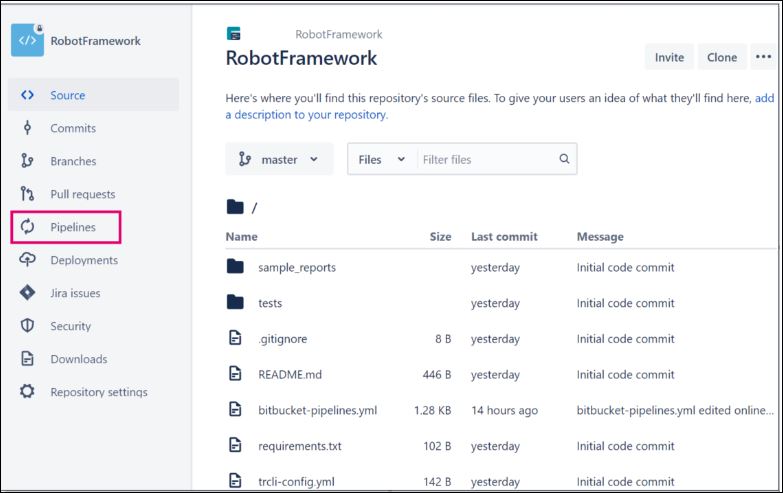
- Click on the repository for which you want to trigger the pipeline. Once inside the repository, click on the Pipelines link from the left navigation panel
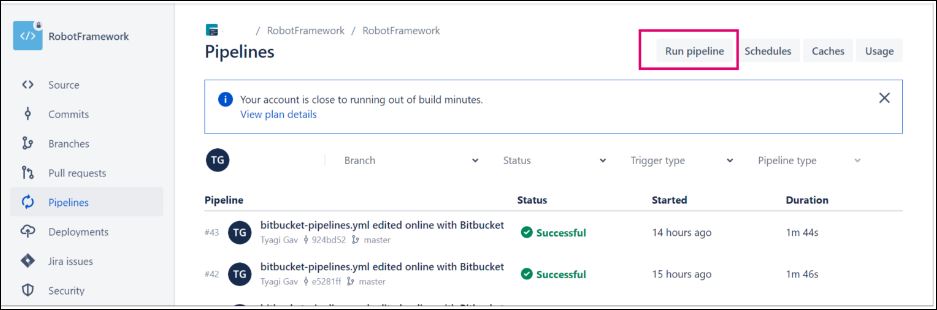
- On the Pipelines screen, click on Run pipeline
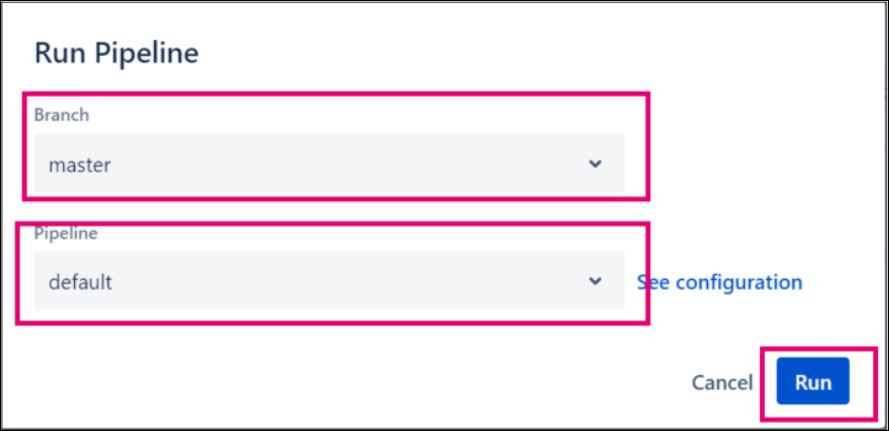
- In the Run Pipeline dialog box, select master as Branch and default as Pipeline, then click the Run button
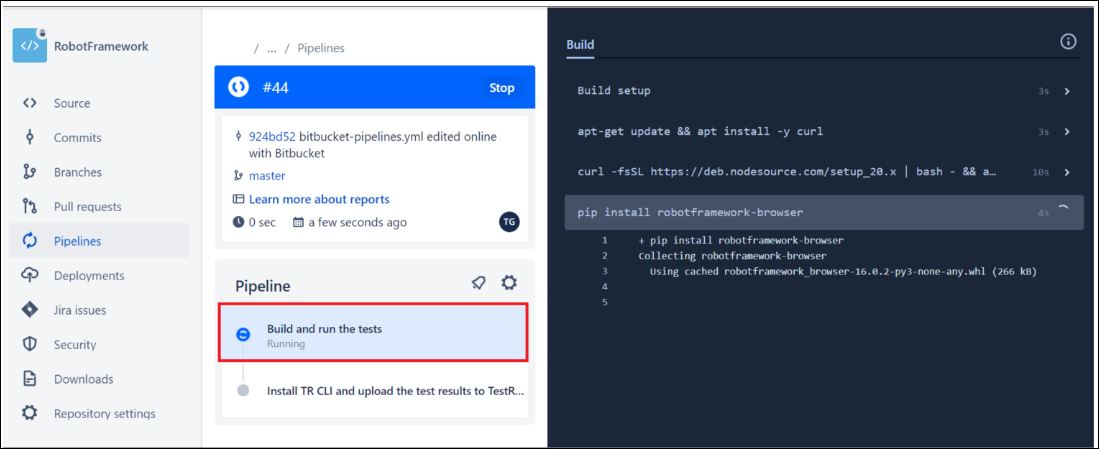
- You will see that the pipeline will start running
- Once the pipeline is completed, it will be indicated with green, as shown in the screenshot below
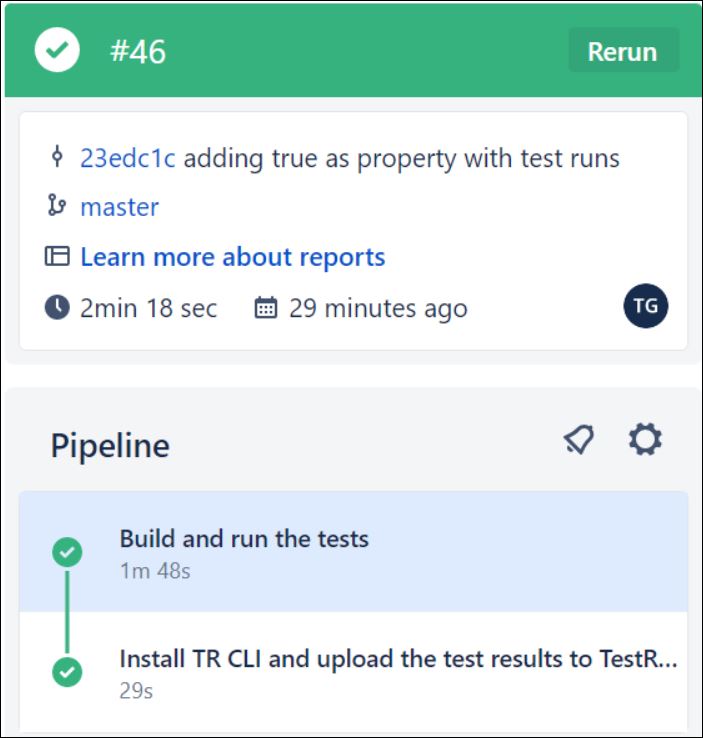
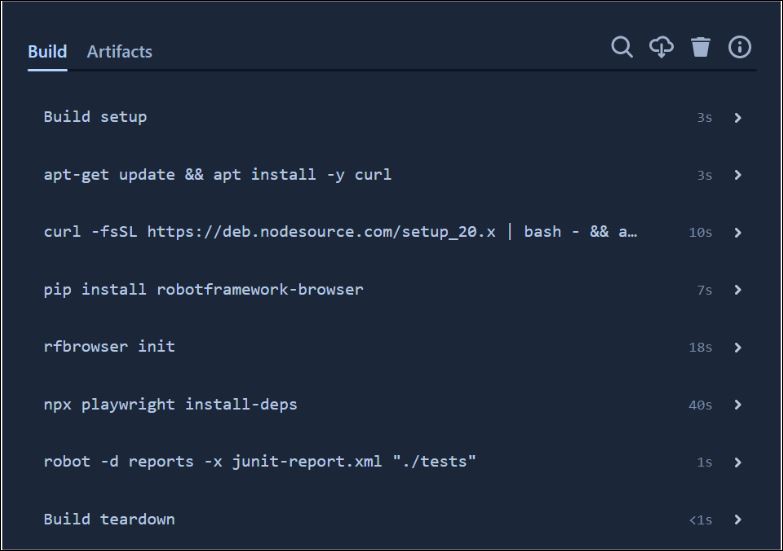
- In the Build log, you can see that the automated tests ran successfully, and the test results were uploaded to TestRail


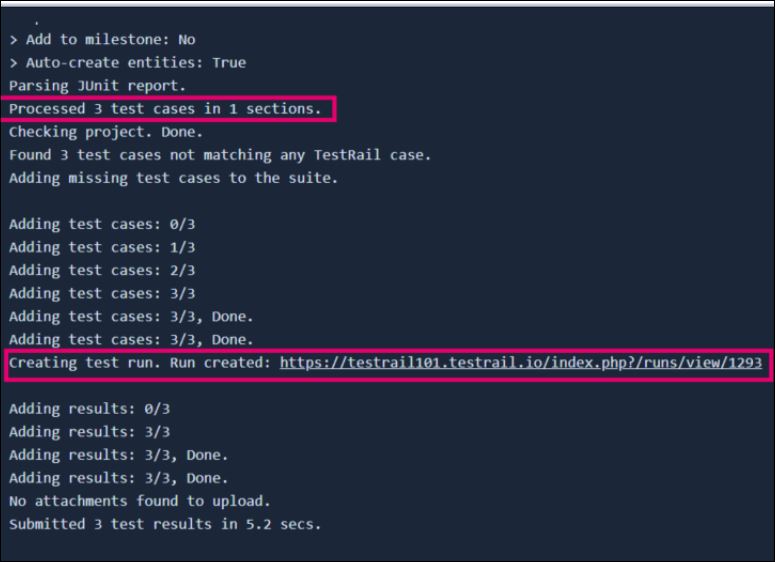
- Now Go to your TestRail instance and see your Test Run results

What next?
Now that you have centralized your test results on TestRail, not only can you check the results of your automated test runs, along with the error messages for failed tests, but you can also aggregate both your manual and automated testing efforts on reports that show you the full test coverage surrounding your app and even track test automation progress. You can also report a bug directly from the automated test result to an issue tracker of your preference as you would do for your manual test results!
You can look into the TestRail’s Reports and Test Metrics video to learn about how you can leverage TestRail’s reporting capabilities.