This article refers to integrating with GitLab Issues. If you’re looking for information about CI/CD integrations, please see the documentation on Integrating with GitLab CI/CD.
TestRail integrates with GitLab so your team can link, view, add, and push issues between TestRail and GitLab as bugs/defects, requirements/references, or both. The TestRail integration with GitLab supports the following use cases:
You don’t have to use all the listed integration options; you can mix and match the integration with other tools. Configuring the integration usually only takes a few minutes. This guide explains how to configure the integration and how it works.
Link test cases to requirements
When establishing test coverage, while creating or modifying test cases, just include one or more Issues IDs (separated by commas) in the References field.
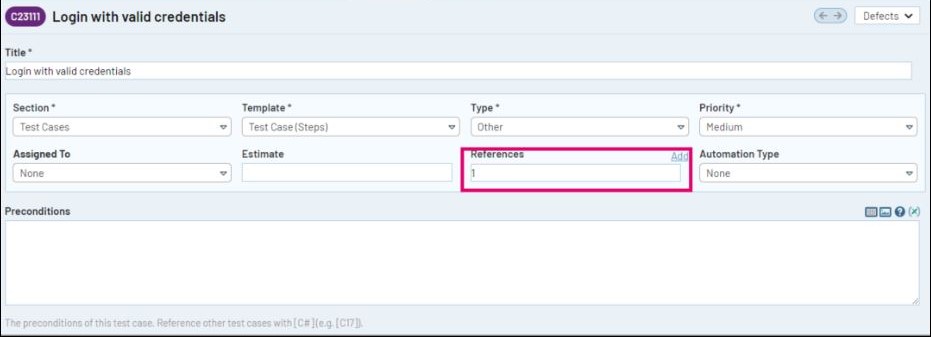
The References you set in your test cases will be converted to a direct link to GitLab issues.

Start creating requirements from TestRail
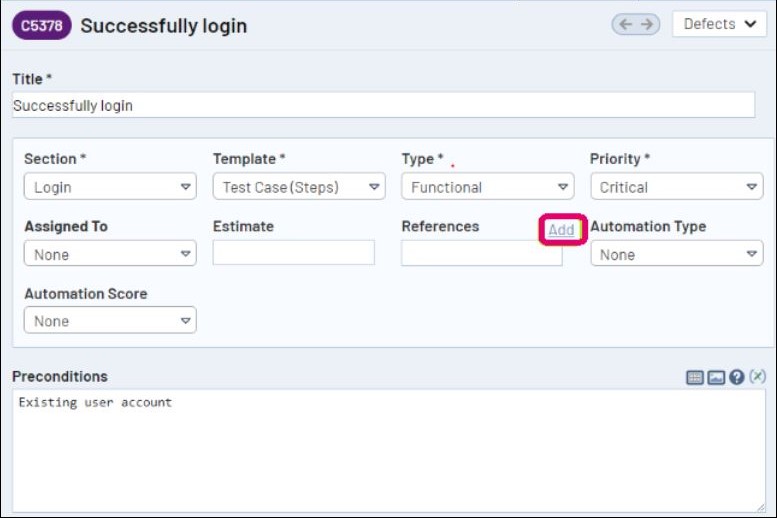
GitLab issues can serve as a source of requirements, making them valuable references for test cases. TestRail offers a convenient Add link feature within the test case editor view, enabling seamless navigation to the GitLab issues screen. This feature expedites the process of creating new requirements that you wish to associate with your test cases. It’s important to remember that once you’ve created a new work item, you should copy and paste its ID into the References field for proper traceability.
Configuring the Reference Add Url
To start creating new requirements from TestRail, you should configure the GitLab Reference Add Url in TestRail by following the steps below.
-
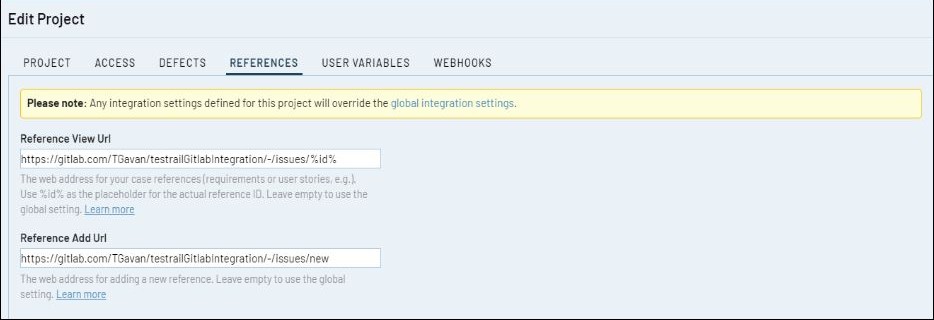
- Go to the Admin page, select Integration to configure globally or Projects for a single project, and open the References tab
- Insert your the Reference Add Url using the following pattern
https://<GitLab_Space_URL>/<project>/-/issues/new - Click Save Settings
View requirements in TestRail
TestRail can retrieve additional information from IDs entered into the References field of TestRail entities, such as test cases, test runs, and milestones. Simply hover over the links and a dialog will show you all the latest information without having to navigate to GitLab.

Configuring the Reference Plugin
To view requirements directly in TestRail, you should configure the GitLab Reference Plugin in TestRail by following the steps below.
-
- Create a User Variable for the GitLab Personal Access Token (PAT)
- Go to the Admin page, select Integration to configure globally or Projects for a single project, and open the References tab
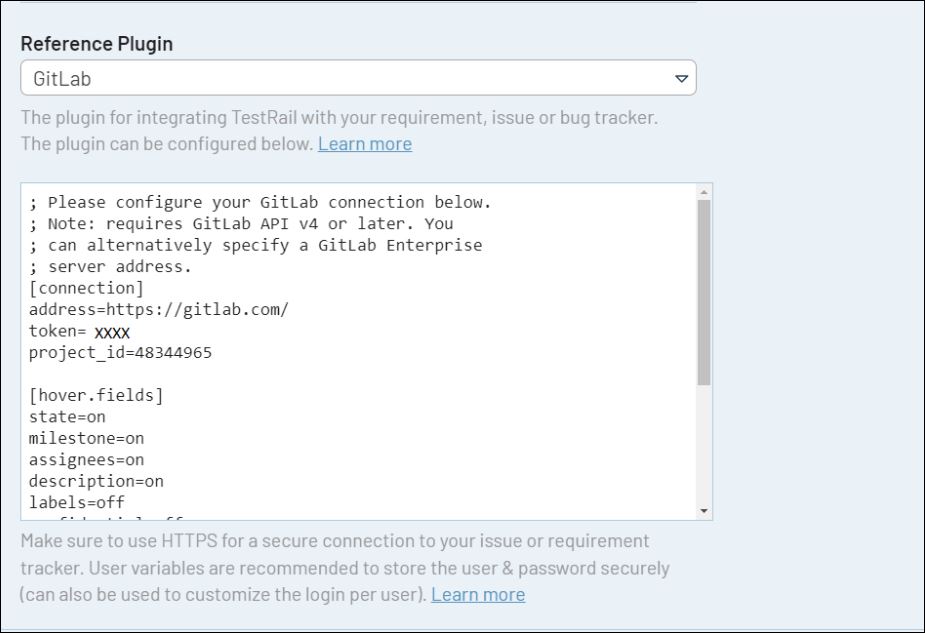
- Select your GitLab variant in the Reference Plugin drop-down list
- Configure the connection settings in the [connection] section
- address: https://<GitLab_URL>/
- token: your User Variable which you can create from GitLab
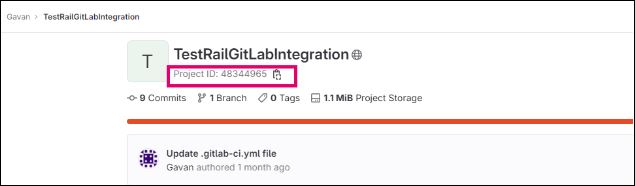
- project_id: your Project ID from GitLab. The Project ID is displayed on the Project overview page, under the project name as shown in the screenshot below
- Click Save Settings
Link defects to test results
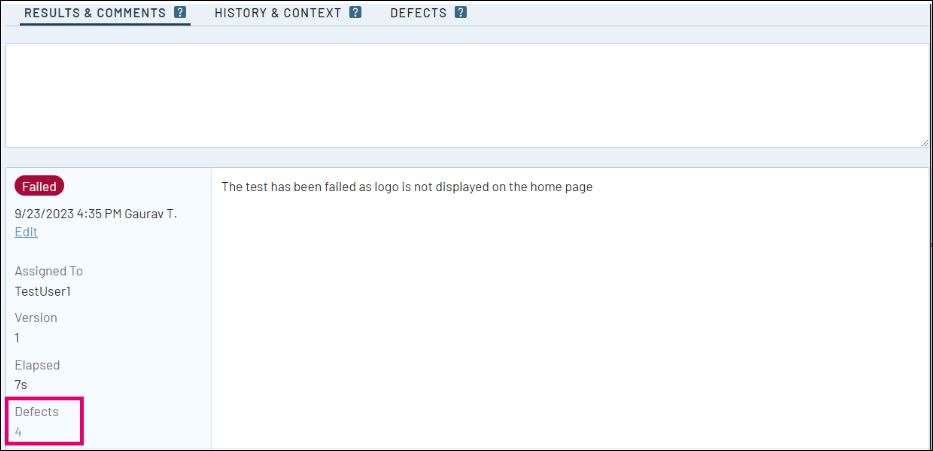
The Defect View URL is used to build a link to GitLab based on the Defect ID, so you can simply click on an ID to open the issue directly in GitLab.
When you set up the Defect View URL integration with GitLab Issues, you can paste the ID of a GitLab issue in the Defects field of a test result and TestRail will automatically convert that ID into a clickable link to view the issue in GitLab. This allows your team to link tests with GitLab issues and create defect and traceability reports in TestRail.
Configuring the Defect View Url
To link defects to test results in TestRail, you should configure the GitLab Defect View Url in TestRail by following the steps below.
-
- Go to the Admin page, select Integration to configure globally or Projects for a single project, and open the Defects tab
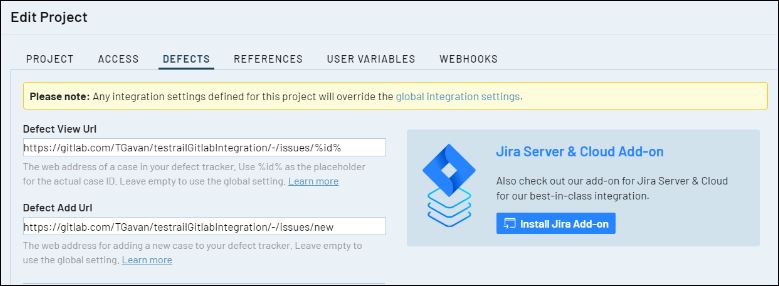
- Insert your Defect View Url using the following pattern
https://<GitLab_Space_URL>/<project>/-/issues/%id% - Click Save Settings
Note : Please make sure to replace <GitLab_Space_URL> and <project>with the actual repository and the owner name in GitLab you want to integrate with.

Submit new defects in GitLab
TestRail provides quick navigation to report defects using the GitLab interface. You can do it from two different places – the Defects menu and the Add Test Result dialog.
The Defects menu, also known as TestRail’s Defect From Anywhere feature, is displayed on top of most pages for quick access.

The Add Test Result dialog displays the Add link next to the Defects field for quickly and conveniently navigating to GitLab in order to submit a defect when your test is failing.

Configuring the Defect Add Url
To quickly navigate to GutHub to create a new defect, you should configure GitLab Defect Url in TestRail by following the steps below.
-
- Go to the Admin page, select Integration to configure globally or Projects for a single project, and open the Defects tab
- Insert your Defect Add Url using the following pattern
https://<GitLab_Space_URL>/<project>/-/issues/new - Click Save Settings
Note : Please make sure to replace <GitLab_Space_URL> and <project> with the actual repo and the owner name in GitLab you want to integrate with.
Submit new defects from TestRail
To enhance the seamless integration of defect reporting, TestRail offers a pre-configured GitLab defect plugin. This plugin empowers you to effortlessly submit new issues to GitLab directly from within TestRail.
By utilizing the intuitive Push Defect dialog, you can swiftly generate a fresh defect complete with a title, description, and any additional fields that GitLab supports. This streamlined process ensures a smoother defect management workflow.

You can open the defect submission dialog from two places – the Defects menu and the Add Test Result dialog.
The Defects menu, also known as TestRail’s Defect From Anywhere feature, is displayed on top of most pages for quick access.
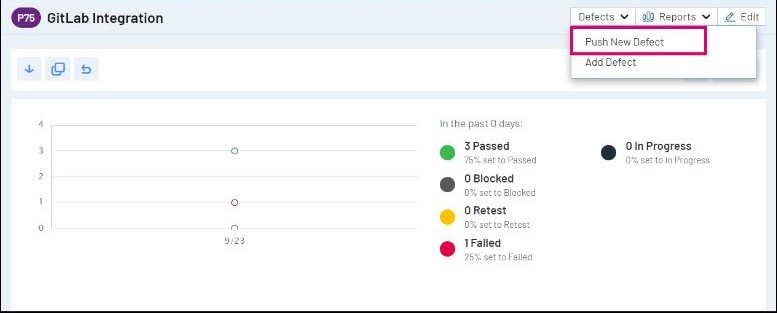
The Add Test Result dialog displays the Push link next to the Defects field to efficiently report a defect while you’re submitting your test results.

Configuring the Defect Plugin
To submit new defects straight from TestRail, you should configure the GutHub Defect Plugin in TestRail by following the steps below.
-
- Go to the Admin page, select Integration to configure globally or Projects for a single project, and open the References tab
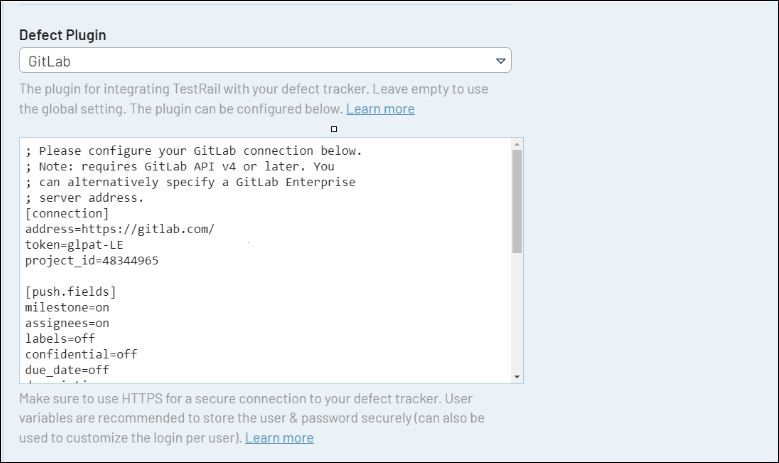
- Select your GitLab variant in the Defect Plugin drop-down list
- Configure the connection settings in the [connection] section
- address: https://<GitLab_URL>/
- token: your personal access token which you can create from GitLab
- project_id: your Project ID from GitLab. The Project ID is displayed on the Project overview page, under the project name as shown in the screenshot below

-
- Click Save Settings
View defects in TestRail
Simply hover over defect links and a dialog will show you all the latest information without having to navigate to GitLab. These links are available in the test results directly, as well as the Defects section on test runs, test plans and milestones.

Configuring the Defect Plugin
To submit new defects straight from TestRail, you should configure the GutHub Defect Plugin in TestRail by following the steps below.
-
- Go to the Admin page, select Integration to configure globally or Projects for a single project, and open the References tab
- Select your GitLab variant in the Reference Plugin drop-down list
- Configure the connection settings in the [connection] section
- address: https://<GitLab_URL>/
- token: your personal access token which you can create from GitLab
- project_id: your Project ID from GitLab. The Project ID is displayed on the Project overview page, under the project name as shown in the screenshot below
-
- Click Save Settings

It is also possible to customize the fields that appear via link hovering. You can see more information on how to do it on the Customizing the Requirement/Defect Plugins section.
Advanced customizations
User variables
We recommend using User Variables when configuring any integration credentials. This allows you to provide generic credentials without disclosing them, and also lets users define their own credentials in their personal
settings, for better access control. Below you can see an example of how to set variables in your configuration.
gitlab_token=%gitlab_token%
gitlab_project_id=%gitlab_project_id%
Customizing the Requirement/Defect Plugins
The GitLab plugin was built to work with a standard GitLab configuration. TestRail allows you to customize the fields which appear in the Push dialog as well as when hovering over work item IDs, both for requirements and defects. Preconfigured push fields and hover fields can be set to on or off in their respective [push.fields] and [hover.fields] sections, and you can also change their order, which will be reflected
in the UI.
Some fields (such as the title) are always enabled and may not appear in these sections due to always being required by either TestRail or GitLab.
In addition to enabling, disabling, or re-organizing fields as described above, it’s also possible to change additional options per field. To do this, you would define a section for the field, such as [push.field.description] and specify additional options within this section.
[push.field.description]
label=Detailed Description
required=true
Please see below for full list and explanation of the available field options:
| Option | Description |
|---|---|
label |
Specifies the display name of the field in the Push Defect dialogue (Required for custom fields) |
size |
Specifies whether the field is displayed as a compact field (compact) or uses the full width of the dialogue (full) |
remember |
Specifies if previously selected values for this field should be remembered and restored the next time the Push Defect dialogue is opened |
required |
Specifies if this field is mandatory or optional and whether users are required to enter a value for this field in the Push Defect dialogue |
Attachments
The GitLab Defect Plugin supports submitting attachments to GitLab as well. This field can be turned on and off, but cannot be customized. To submit one or more attachments to GitLab, simply drag the attachment to the attachments or description areas of the push dialog or click on the area to choose an attachment from your file system.
To enable attachments in the push dialog, add ‘attachments=on’ to the [push.fields] section of the Defect Plugin’s settings.